

Retool has recently had a boost in speed and power, which has made switching between applications much more seamless and performant. This has opened the door to creating beautiful and functional multi-page applications and a smooth-functioning internal app infrastructure.
When building a multi-page app system, it’s more important than ever to prioritize good UX/UI design. In this post, we discuss how to pass data between apps via local storage and URL parameters, using breadcrumbs for navigation, landing pages, and more Retool-specific tips.
Let’s jump in.
How (and why) should you break up Retool apps into pages?
Creating multi-page apps means you can:
- Largely reduce the load in any given application to improve the speed of queries and more
- Reduce the amount of maintenance through clearly separated application logic
- Use DRY (don’t repeat yourself) principles to keep code clean
- Allow you to manage permissions for app functionality
- Create a true admin portal look and feel
Load-time: Use multi-page to separate heavy queries and improve page load
Start by looking at your debug tool in your heavy apps and inspect which queries are loading simultaneously - focus on the ones that take the longest to load and may be secondary to the app’s primary function, perhaps hidden in a modal or three pages down. Could these queries be placed into a separate ‘page’, and therefore only load when in use? This is the kind of thinking that will create those most performant apps in Retool.
Let’s take an example: our app displays company data in a table and clicking a modal opens up a page of charts and further data for each company. The queries in this modal take a long time and slow the overall performance of the application. In this case, creating a separate page to host these further details makes a lot more sense. Here, you can create a more effective UI and each page will load faster.
Charts and complex arithmetic scripts are also good examples of queries that are best separated into separate apps so that they don’t slow key functionality down.
However, if you can’t separate these into separate pages or it doesn’t make sense to, you can still use the same principles of multi-page apps to boost performance: reduce the number of queries that run on page load and instead create different triggers for secondary queries (such as dropdown options) using event handlers.
You could also do this using a consistent sidebar navigation system, which triggers queries to run on click or run them when a modal is clicked. Be selective of how you trigger these queries to make sure the query always updates when it needs to, and still loads if the page is left open or refreshed.
DRY principles: Creating separate app pages for repeated functionality
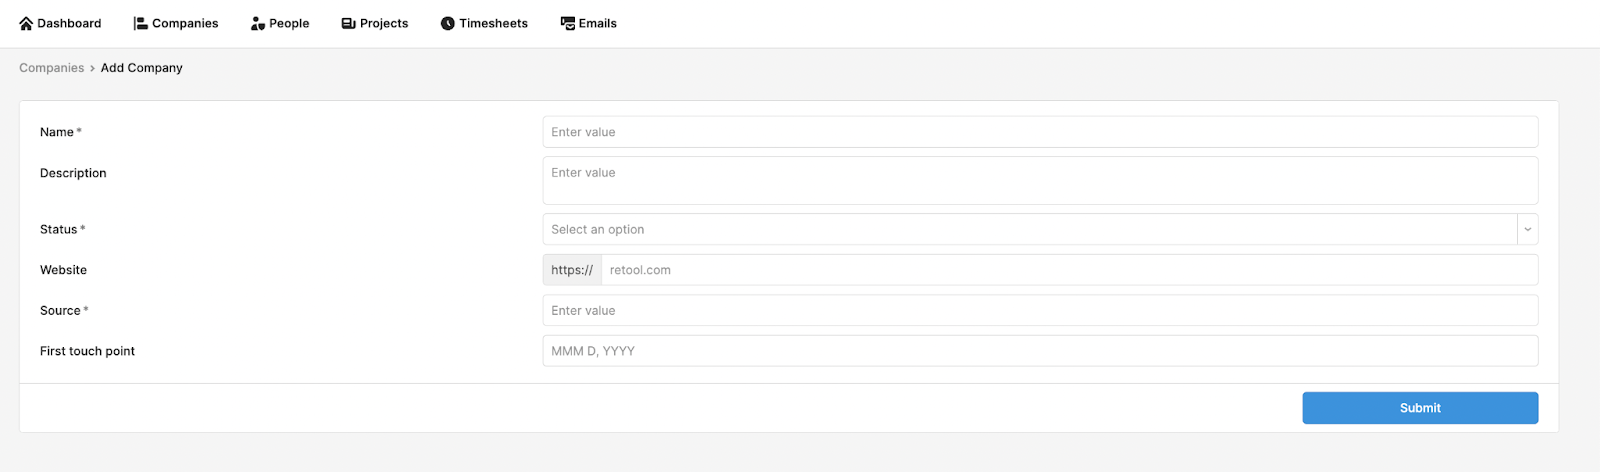
Now, hear us out on this, as it may sound a little strange, but one of the best uses of multi-page apps is to separate things like forms from your apps. Why? One reason is that you have more space and flexibility to improve the UI of the form (see our UI for forms tutorial for more tips), but the bigger reason is maintenance and updates.
Let’s use an example: if you keep your CRM’s ‘New company’ form on a separate page, you only need to update it in this one place, and you can link it from any of the other pages. This can be great for a complex CRM with different views - your ‘Add new’ button can be placed anywhere and everywhere, and this will link to a single form page. This form only needs to be changed once if you want to add, delete or change the fields, rather than many times over several modals in your various apps and views.
From here, you can even create a dynamic form that switches between ‘Add new record’ and ‘update existing record’ depending on whether the information is passed through the URL params (see below). This works on the basic DRY principles of coding - which are still important when using builders like Retool. Debugging and maintenance are streamlined and you can develop more effectively.
When should you stick to modals and keep things in-app?
While performance can be hugely improved by separating functionality into pages, it can certainly be a good idea to keep some things in-app.
For queries that are already running on page load, and data has been loaded into the frontend already, it makes sense to make use of this on the same page. Where a query loads product details into a table, keeping additional details (that have already been loaded) in a modal is a performant way of presenting this data. It’s also worth thinking about data you might need to see simultaneously for comparison - separating these into different pages will affect functionality.
So now we know what and how to separate functionality into multiple pages, let’s have a look at some development tips that help improve the UX/UI and performance of these app systems.
How to build multi-page apps best
UI tip 1: Pass information between apps
When we work with multi-page apps, we are often using the same information across several different interfaces, and it can make a real difference when the data you are currently working with is passed through to the relevant next page.
Let’s start with an example use case. Let’s imagine we have multiple pages in Retool that focus on our customers. Our customer support team can track their payments, posts, and interactions - all through each of these different pages. However, their operation is slowed by having to reenter the customer’s ID on each page to retrieve the respective data.
Currently, there are two main ways to pass data between pages in Retool: using URL query parameters and using local storage. Let’s run through how and when to use each and how to use these tools effectively.
Query parameters are a set of parameters appended to a URL that passes information into the app - we can access these values in a Retool page by using JS escape hatches and the object {{urlParams}}. Retool provides a handy event handler UI where you can add the query parameters to pass this information from one app to another. When the new app opens, those values will be passed into the URL of the next app, and we can reference them to pull up the corresponding data immediately.
Retool also provides the option for entering hash parameters. Hash parameters are generally used for saving the state of a single page application (single URL), while query parameters can be used to pass data for multiple applications (multiple URLs).
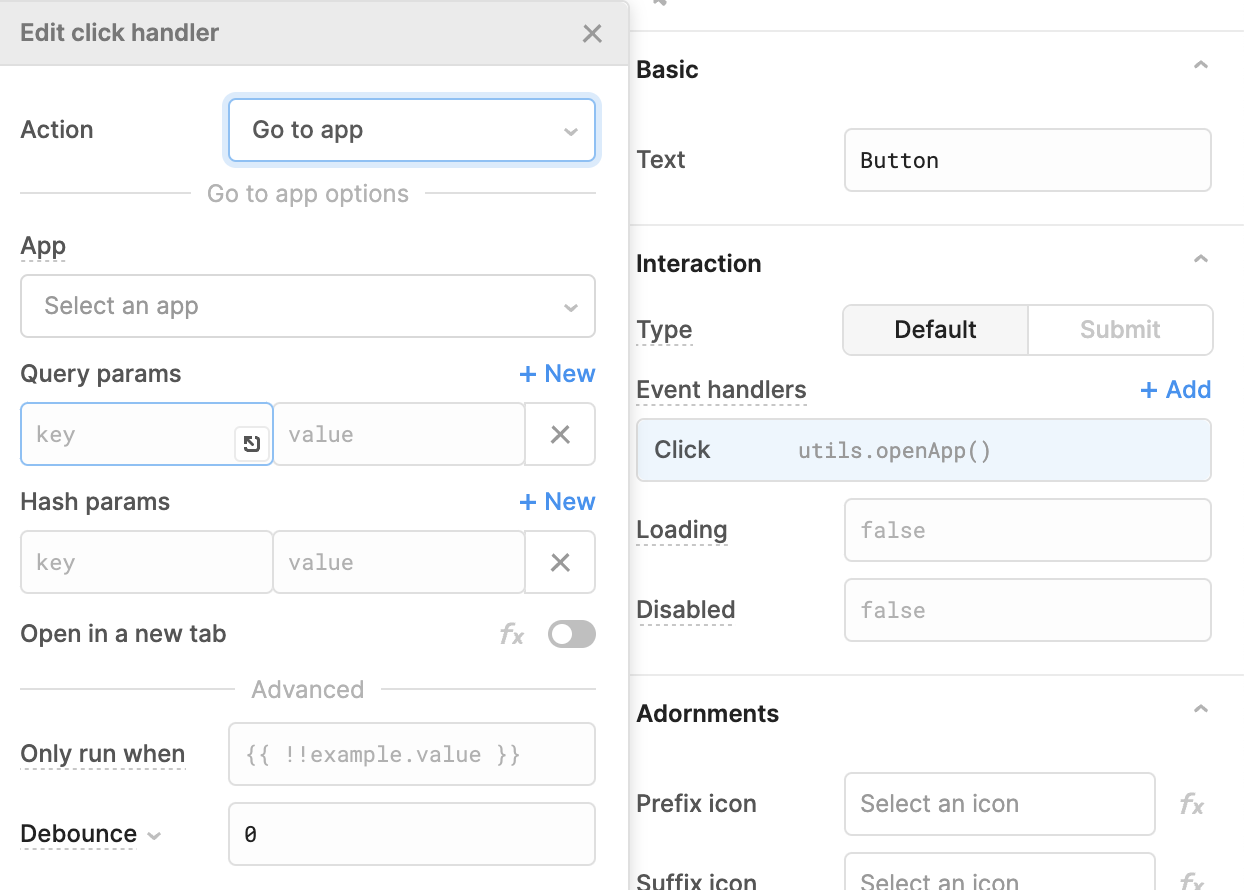
For cases in which an event handler isn’t possible (like in a table action), you can also write a JS script to open another page using the utils.openApp() utility method provided by Retool. Here is an example:
utils.openApp("371ac2f8-3aaf-11ed-8b80-836b0df4638d", { queryParams: { source: "updateUsersApp" },}):To illustrate with an example, our customer app’s event handler might look something like this:
Now, once our event is triggered by a button click or other option, we will be redirected to our second Retool page with the query parameter included in the URL.

On this page, we can then reference the customerID query parameter via JS escape hatches, using: {{urlParams.customerID}}. The default values for the components in this next app could be set to this customerID, Make sure to only set this as a default if a query parameter is passed through.
Local Storage. Another great way of passing data between apps is through local storage. Local storage is a property that allows for saving key-value pairs without expiration in the browser. This means that even after a Retool page is closed, the data will persist in the user’s browser until they reopen the application.
In Retool, all pages share the same local storage. This means we can pass data seamlessly between different Retool pages. This is particularly useful for passing larger datasets or objects between applications that we wouldn’t want to include in our URL.
Retool has also built out a nice event handler UI to engage with local storage.
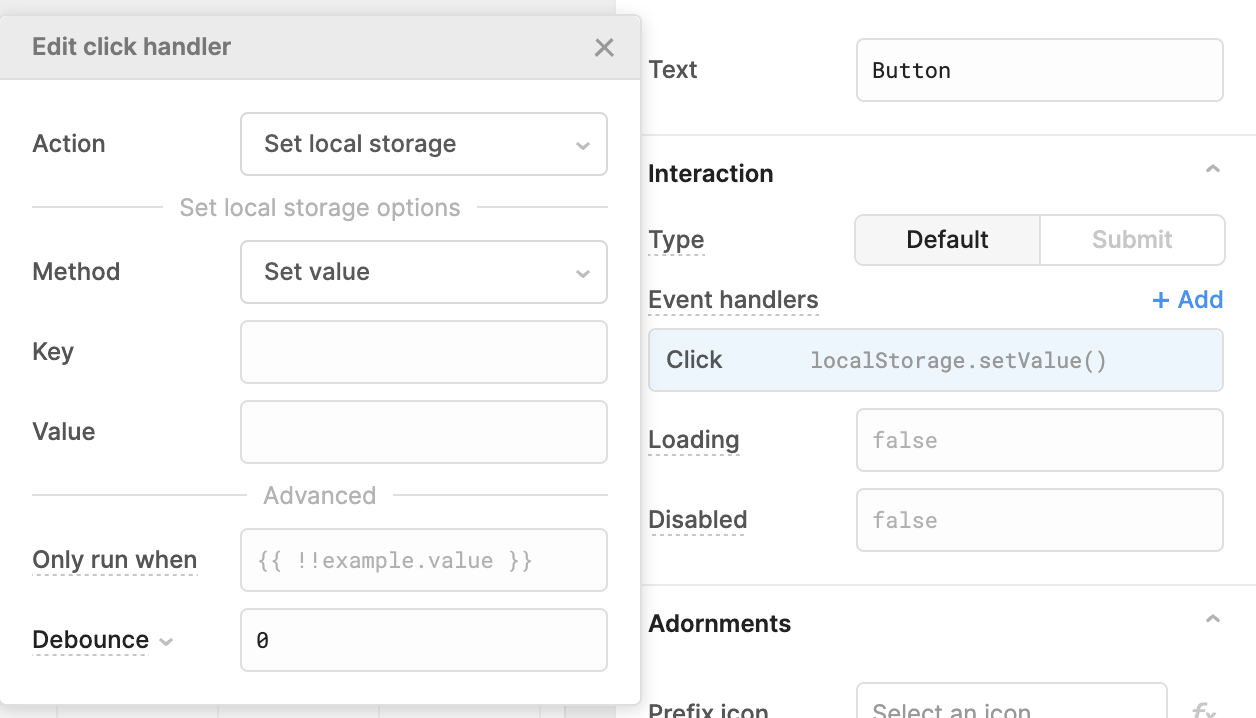
Like when using URL parameters, you can input data manually or using JS escape hatches to save in local storage and import into the next app. Once your new app opens, you can set the default values to be the local storage object using localStorage.value.
UI Tip 2: Use breadcrumbs for efficient navigation
When navigating between different pages, and especially when you are drilling down into data, it's a good idea to use the breadcrumb component to track navigation on the page. This makes it much easier for users to navigate back to where they were, and also gives them context for the page they are looking at.
Let’s take an example of our bespoke CRM in Retool. In this case, we have a large emphasis on viewing records in a table, as well as being able to drill down into a specific client, where we can perform actions on the client level.
You can program the breadcrumbs manually if there is only a single path, or map them using JavaScript if you need the breadcrumbs to be defined dynamically.
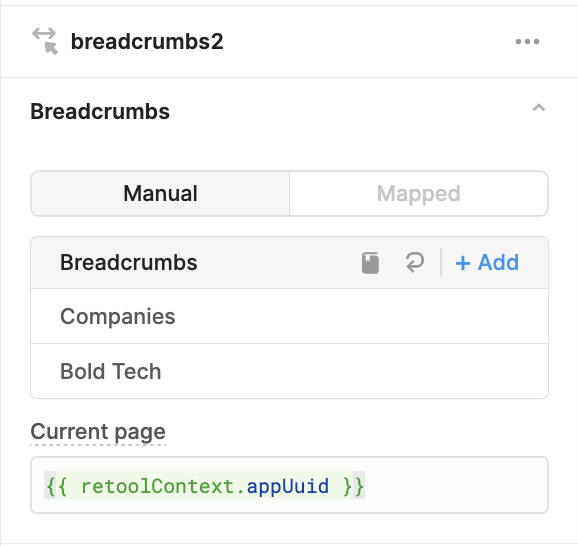
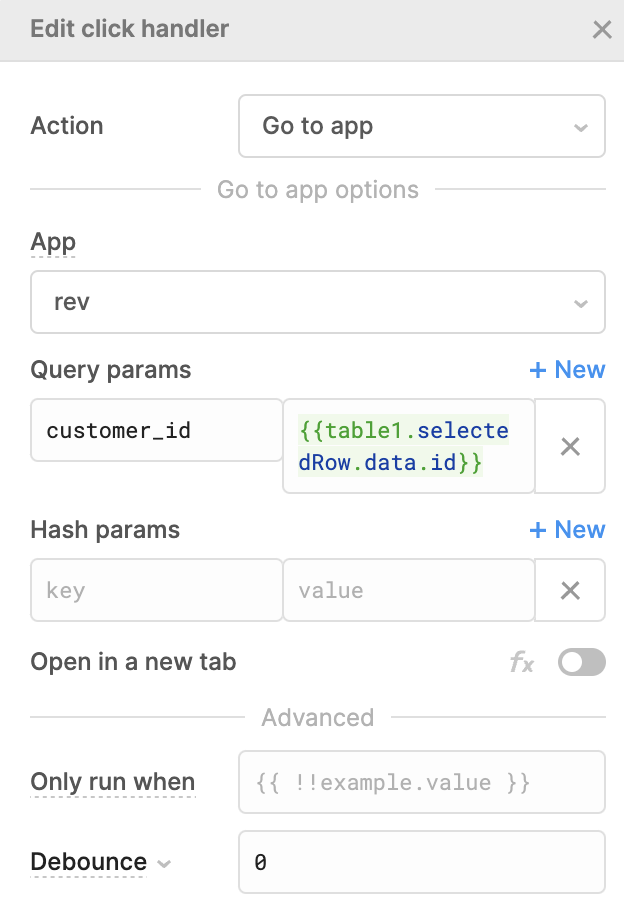
You can also pass through an ID or the app name of the current page (retoolContext.appName) in the URL parameters of your ‘open app’ event handler and use this to define the breadcrumb links.

By passing the company_id URL Parameter, we can load a blank company details page with the selected company’s details.
Now the breadcrumbs link back and show the trail of how we got to that page to provide great navigation UI.

UI Tip 3. Create landing pages and organize your Retool folders
When developing multi-page applications in Retool, your Retool page/app directory for an application system might look something like this:
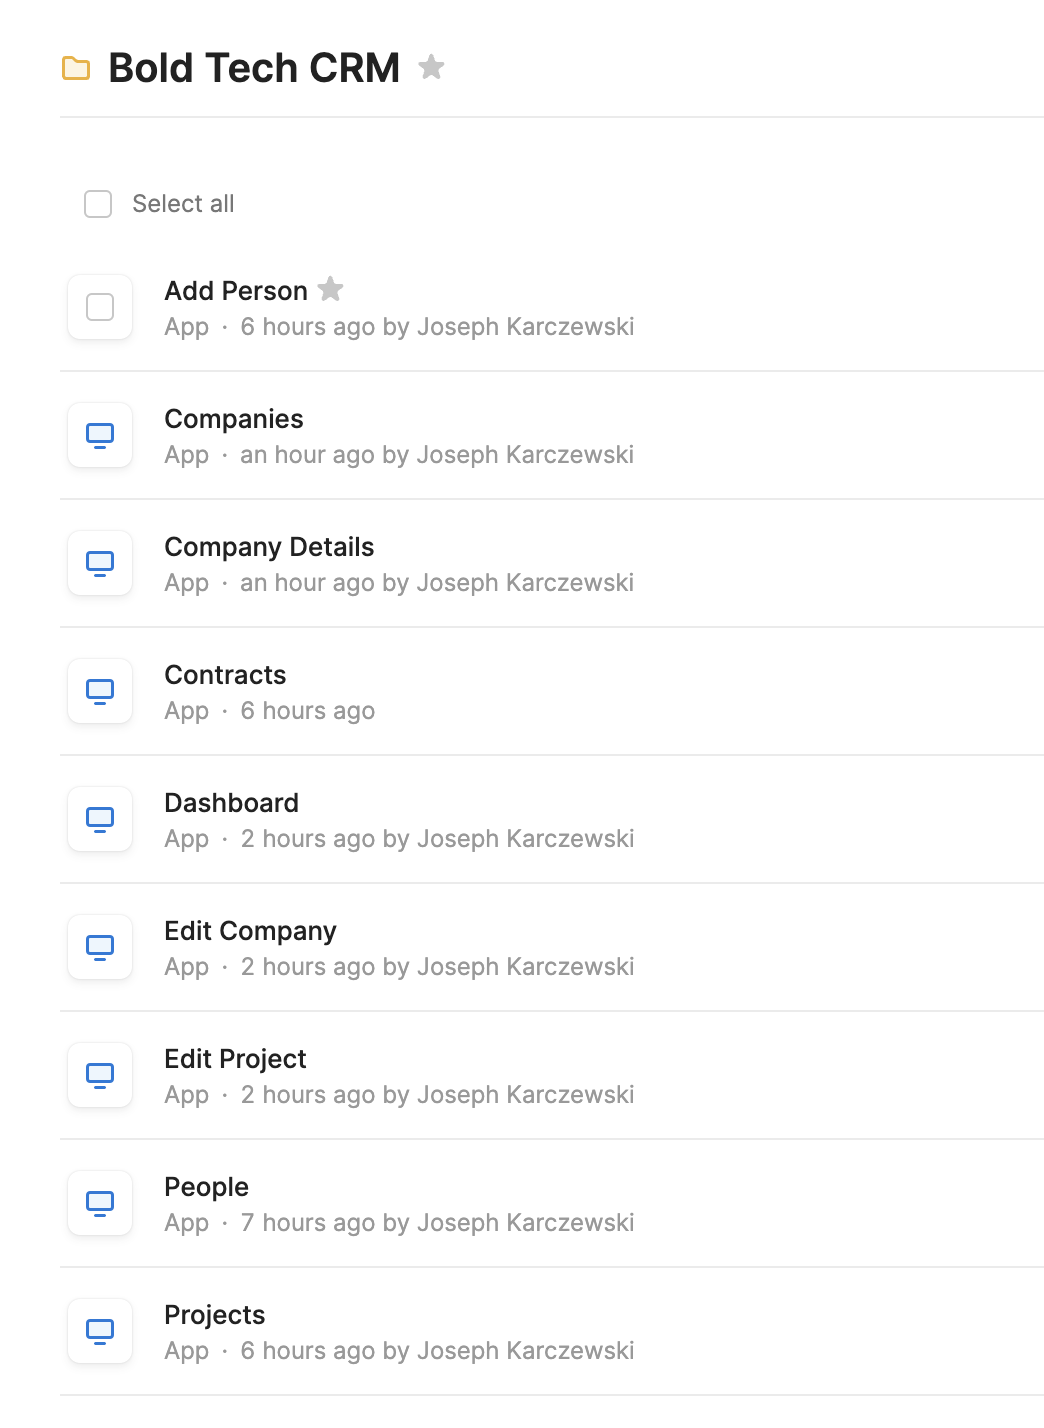
This isn’t a good UI for your users to land on, nor is it a good way to manage permissions if all users see this screen. It also undoes your hard work of optimizing your navigation UI in the apps themselves! As the developer- make sure to keep your folders organized for easier maintenance.
If your users don’t need to see the Retool environment, and just need to log straight into the apps they are using, you can set their landing page to open directly on an app.
In the permission group settings, you just need to select a permission group and set their Workspace homepage. Now, when they log in, it will open straight on that page.

You could set this to be the first app or homepage, or you could even create a separate company landing page where they can choose their app.
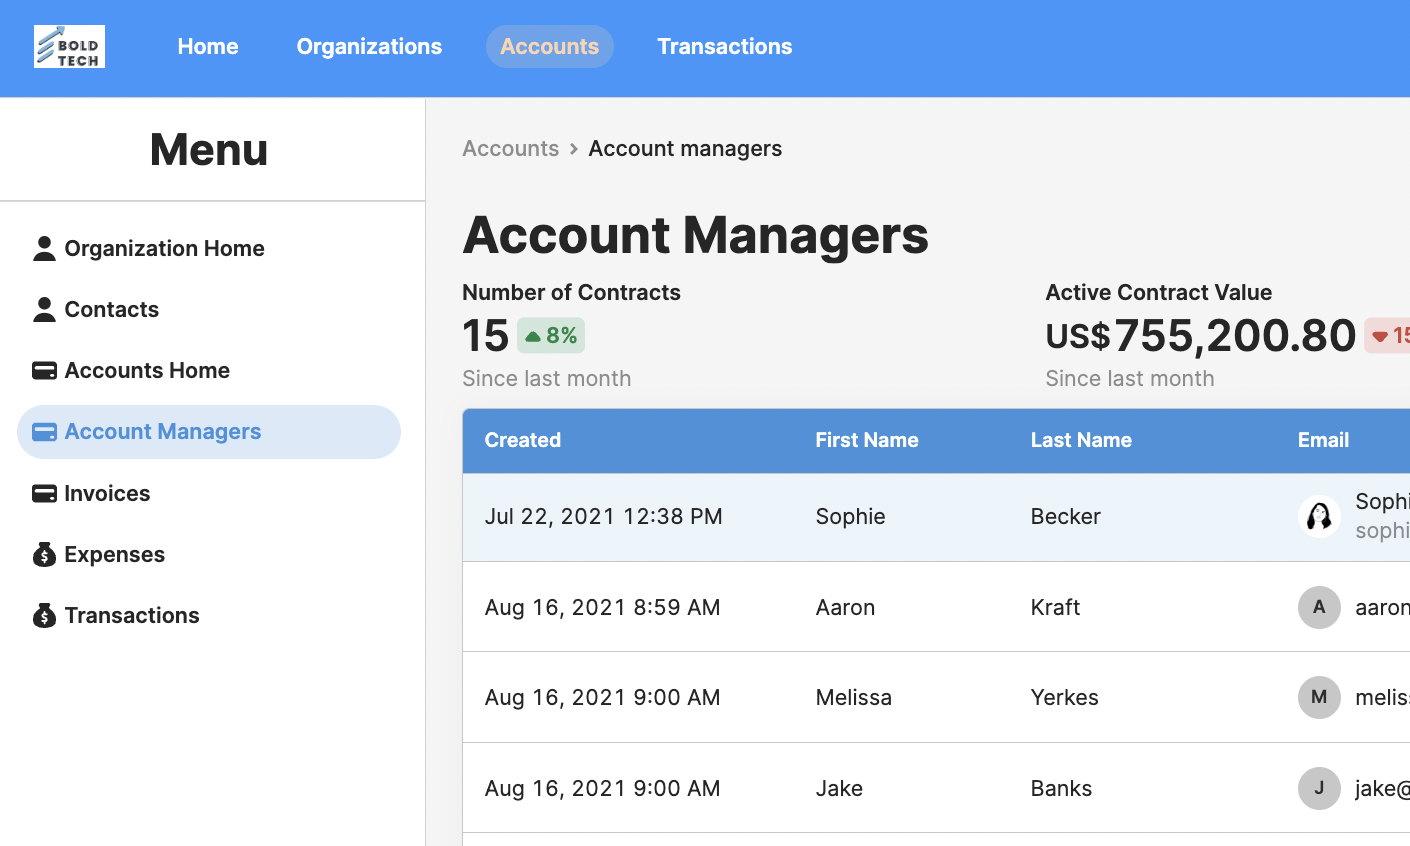
UI tip 4: Maintain consistent header and sidebar frames across all pages
Part of the beauty of multi-page applications is the feeling a user gets when the app pages feel like one holistic application system, and navigation is seamless. To achieve this, make sure you maintain a consistent header and sidebar across all application pages. This provides the user with a consistent and clean UI experience across all pages.
We go into more detail about navigation UI in our Sidebar Layouts in Retool blog post.
With that, you should hopefully be feeling well-equipped to create and optimize your multi-app systems in Retool. Looking for a specific tutorial? Email sophie@boldtech.dev and we’d be happy to help.


